Purpose
The purpose of this lab was to show how you can separate genes with current technology. This is used in forensic investigation mostly. The lab taught me to properly use a micro-pipette as well. This also shows how different genes are in different people according to their heritage.
Extraction Procedure
1. Vigorously swirl 10 mL of saline solution in your mouth for 30 seconds. Note: The saline solution is a 0.9% NaCl solution, the salt concentration of your blood plasma. 2. Expel saline into a cup and swirl to mix the cells. 3. Label a 1.5 mL microfuge tube with you PIN. Note: A PIN (personal identification number) can be any combination of 2–3 numbers or letters that can uniquely identify you. 4. Transfer 1000 µL to 1500 µL (1 mL to 1.5 mL) of the saline/cell suspension into the labeled microfuge tube. 1–1.5 mL saline 5. In a microcentrifuge, spin your saline cell suspension for 1 minute to pellet the cells. Be sure to use another student’s sample as a balance. Note: Centrifuge speed should be set to 10,000 x g (10,000 rpm). Alu PV92 PCR Student Guide Fall 2012 6 6. Observe our cell pellet at the bottom of the tube. If you do not have one, you may need to start over with another 1–1.5 mL saline rinse. Pour off the supernatant into your cup, being careful NOT to lose your cell pellet. Note: There will be about 100 µL of saline remaining in the tube after you pour. 7. Check to make sure you can see your cell pellet and that there is about 100 µL of saline covering it. You may need to add more saline to get up to about 100 µL. Rack or flick tube to mix, which will “resuspend” the cell and make an evenly mixed solution. Note: You can also “rack” your sample. Be sure the top of the tube is closed, hold tube firmly at the top, and pull it across a microfuge rack 2–3 times. Resuspend cells in ≈100 µL saline 8. Obtain a tube of Chelex from your instructor. Label with your PIN. 9. Withdraw 50 µL of your cell suspension from step 7 and add it to the tube containing Chelex. Note: Do not pipet up and down at this step, as it will clog the tip with Chelex beads. 10. Heat block version: If your Chelex (with the cell suspension) is in a normal 1.5 mL microfuge tube, take your tube to a heat block station. Slide a cap lock onto the tube lid and place it in the heat block for 10 minutes. Keep track of your tube in the heat block. Alu PV92 PCR Student Guide Fall 2012 7 PCR tube version: If your Chelex (with your cell suspension) is in a tiny PCR tube, follow your teacher’s instruction on placing it in a thermal cycler at 99°C for 10 minutes. Record the location of your tube. 11. After heating, gently remove the cap lock and open the tube to release the pressure. Caution: the tube will be hot! Close and then rack or shake the tube well and place it in a centrifuge to spin for 1 minute. 12. Obtain another clean microfuge tube and label it with your PIN. Also write “DNA” on this tube. 13. Holding your tube at eye level, use a P-200 to withdraw 50 µL of supernatant from the Chelex/DNA tube to the new, labeled tube. Be sure NOT to transfer any Chelex beads. Note: This is your isolated “DNA” sample. 14. Have someone check the “DNA” tube to be sure that no Chelex beads were transferred into it. There should be NO Chelex beads present, as they will interfere with the PCR. 15. Place your DNA tube in the class rack. Your teacher will refrigerate your isolated DNA until you are ready to prepare your PCR amplification. Alu PV92 PCR Student Guide Fall 2012 8 Polymerase Chain Reaction 1. Obtain a tiny PCR tube. Label it with your PIN number, just under the lip. Note: Keep our PCR tube on ice when setting up the reaction. 2. Pipet 20 µL of Master Mix into your PCR tube. 20 µL of Master Mix 3. Change your pipet tip and add 20 µL of Primer Mix into your PCR tube. 20 µL of Primer Mix 4. With a new pipet tip, add 10 µL of your extracted DNA into your PCR tube. What is the total volume in your tube? _________ µL Note: Make sure that all the liquids are settled into the bottom of the tube and not on the side of the tube or in the cap. If not, you can give the tube a quick spin in the centrifuge. Do not pipette up and down; it introduces error. 10 µL of DNA 5. Setting up the controls: a. Two students will be asked to set up the positive control reactions (+C) for the class. They will use the positive control DNA provided in the kit. There should be enough +C PCR sample for one lane on each gel. b. Another two students will set up negative control reactions for the whole class (–C). They will use sterile water. There should be enough –C PCR sample for one lane on each gel. Control Master Mix Primer mix DNA + 20 µL 20 µL 10 µL +C DNA - 20 µL 20 µL 10 µL sterile H20 6. Check the volume of your PCR tube by comparing it to a reference PCR tube with 50 µL in it. It should be near the thermal cycler, set by your teacher. Note: If the volume of your tube does not match, see your instructor to troubleshoot. You may need to set up the reaction again. PCR Tube Reference Tube 50 50#μL Alu PV92 PCR Student Guide Fall 2012 9 7. Place your reaction into the thermal cycler and record the location of your tube on the grid provided by your teacher. 8. The cycling protocol for amplification of Alu PV92: 1) 95°C hold for 2 minutes 2) 30 cycles of: 94°C for 30 seconds 60°C for 30 seconds 72°C for 2 minutes 3) 72°C hold for 10 minutes 4) 4°C hold, ∞ infinity
TRADEMARKS: Applied Biosystems, AB (Design), GeneAmp, and Primer Express are registered trademarks and Veriti and VeriFlex are trademarks of Applied Biosystems Inc. or its subsidiaries in the US and/or certain other countries. AmpliTaq is a registered trademark of Roche Molecular Systems, Inc. All other trademarks are the sole property of their respective owners.
© Copyright 2001, Applied Biosystems. All rights reserved.
Materials0.5 ml of 10% Chelex in sterile microcentrifuge tube 15 ml centrifuge tube with 10 ml of 0.9% NaCl 50 ml centrifuge tube 15-ml and 50-ml centrifuge tube racks clinical centrifuge & high-speed microcentrifuge sterile plastic transfer pipette boiling water bath & tube float for water bath forceps/tongs to remove float jar with sterile 1.5 ml microcentrifuge tubes jar with sterile 0.2 ml PCR tubes microcentrifuge and PCR tube racks ice/ice container Sharpie markers SML latex gloves P20 and P200 micropipettors rack of sterile P20/200 yellow tips minifuge, purple, 6 place TPALU 1 primer (Stock, 25 pmol/ml) TPALU 2 primer (Stock, 25 pmol/ml) PCR master mix: Primers + 5X Green GoTaq® PCR buffer 10 mM dNTP's (40X) GoTaq® DNA polymerase sterile, nuclease-free water thermocycler Gel Analysis of Alu PCR Products Owl Horizontal Gel System 12x13.5 cm agarose (2% gel) 1X TBE 100-bp ladder (0.13 mg/ml stock in OG) 5X Orange G Loading Dye 1 mg/ml ethidium bromide Tupperware staining dish w/lid UV transilluminator UV face shield/goggles Digital camera, hood and printer HP Everyday Photo paper Final PCR Solution/Reaction: 1X PCR Buffer (w/ 1.5 mM MgCl2) 250 M dNTP’s 0.5 M each primer 1 unit GoTaq® DNA polymerase
|
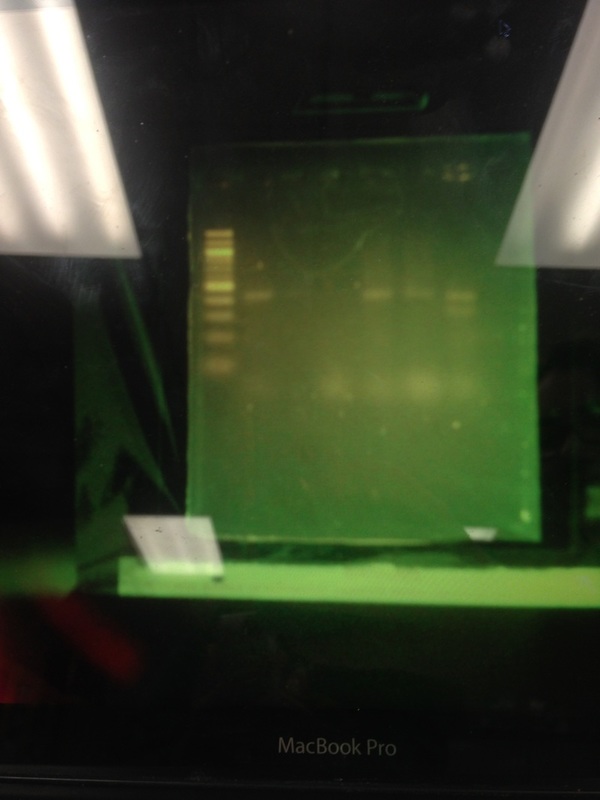
Hypothesis and resultMy hypothesis for this experiment was that if both of my parents had Alu then so would I as it turns out only one of my parents needed to carry the gene to pass it on. I am +- so I have the Alu gene.
|
Analysis and conclusionMy hypothesis was that I would only have the Alu gene if both my parents had had it. My hypothesis was incorrect only one of my parents have the gene but I still was passed it. My analysis of the experiment is where I make sense of the results. The results are I have the gene sequence ALU in my DNA.
|
